Stanley Park is large urban park in Vancouver. It is adjacent to downtown, so it’s easy to get to, and yet as soon as you enter the park, the city couldn’t feel further away. Because the park is so big — even larger than New York’s Central Park — it can be difficult to figure out exactly what to see and do in a limited amount of time.
This post will walk you through just that. We’ll start with an introduction to Stanley Park and how to get around, including an entire section on biking. Then we’ll explore the best things to see and do at the park, before answering some of the most important questions you might have. (Like where are the bathrooms?!) Finally, we’ll weave it all together into a perfect itinerary that you can do in a day.
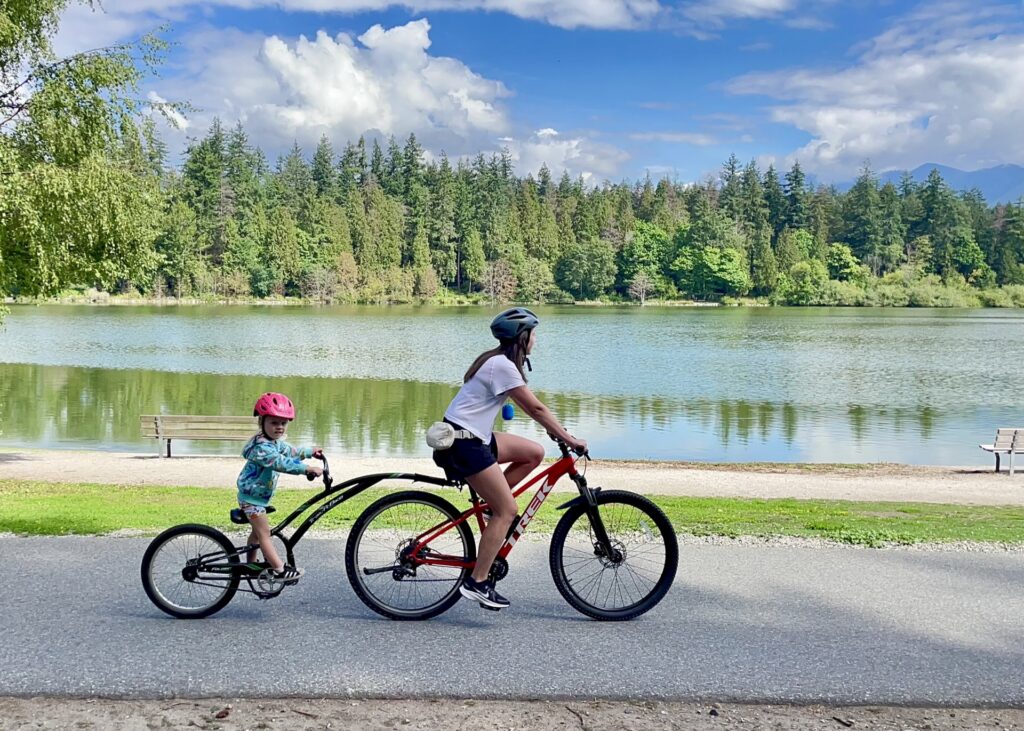
We went to Stanley Park on our first day in Vancouver, and we loved it so much that we went back again on our last day in town. I’m excited to share everything I learned about this charmed park so that you can have as much fun as we did. Read on to learn more about Vancouver’s Stanley Park!
Get to Know Stanley Park
Stanley Park sits on a large peninsula on the northwest side of Vancouver, about a mile west from the heart of downtown. You can get to the park from downtown by taking one of several buses that run along Georgia Street or by taking a lovely stroll up Robson Street.
The park is just over 1,000 acres. The center of the park is hilly and covered with trees, many of which have grown in the area for centuries. While the park is home to many wild animals — including bald eagles, raccoons and beavers — there are no large animals or bears to worry about. There are several hiking trains that cut through the middle of the park, but the most popular route is the Seawall.
The Vancouver Seawall is a waterfront bike and pedestrian path that follows the perimeter of Stanley Park. The Seawall is about 10 km long, fully paved and mostly flat. Most of the route has separate paths for bikes and pedestrians, but during sharp curves and narrow segments bikers are required to (and do!) dismount.
Stanley Park has a variety of attractions, viewpoints, picnic areas and restaurants around the Seawall and within the park. Most of these things we’ll cover in the things to do section below, but the highlights include the Vancouver Aquarium, totem poles, and a large public swimming pool.
How to Get Around Stanley Park
Getting around Stanley Park isn’t exactly walk in the park. Since the park is so big, you’re going to need a lot of time or the help of some wheels if you want to see a lot of it. Here’s a look at the main ways to get around Stanley Park, including some pros and cons of each.
- Walk: The most obvious option is to walk, and the Seawall is the most popular route. This will take 2-3 hours, depending on how fast you go and how many stops you make. It’s a mostly flat walk on a paved trail with great views the whole way. If you don’t have that long, you could also stick to the southern portion. I would recommend the area between the Lost Lagoon and the Totem Poles (a route like this), which is closer to 1 mile.
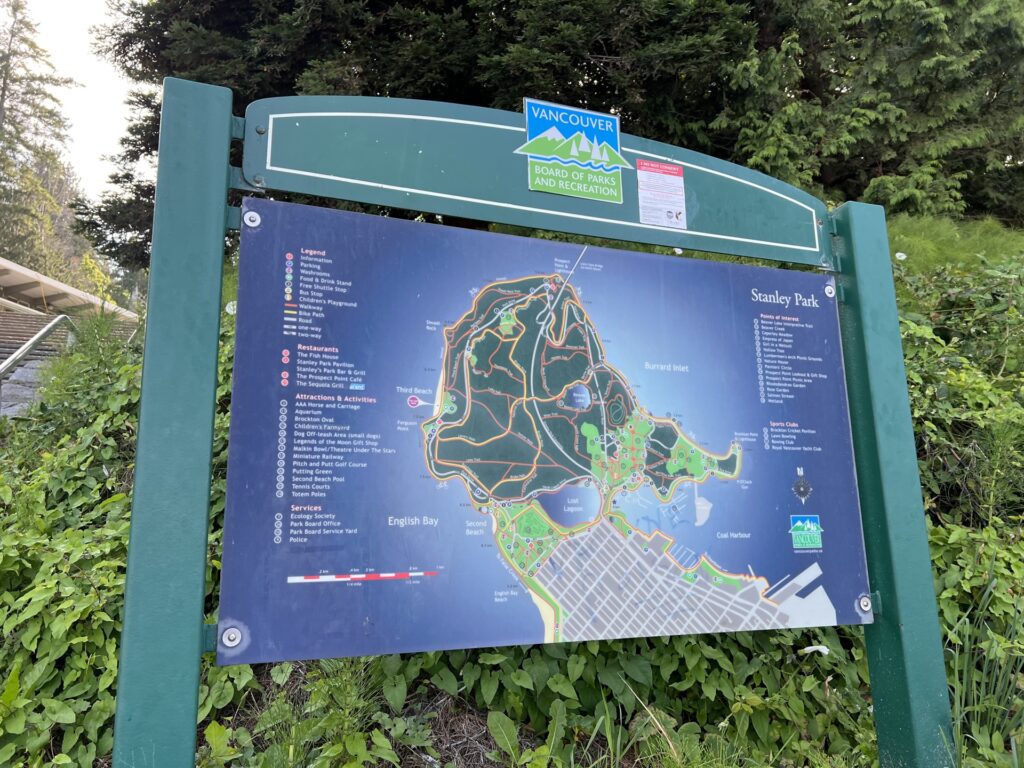
- Hike: This is still walking, but in this case I’m referring to the trails instead of the Seawall. If you want to see more of the forest, lakes and wildlife, consider taking one of the 25 walking trails that cut through and around Stanley Park. There’s not one straight path, so you can string together a series of trails to meet the amount of time and distance you want to cover. These trails are still paved, but are hillier than the Seawall. You can view and download the trail map here.
- Run: The 6ish-mile Seawall loop is perfect for runners, especially if you hit the pavement early before the crowds hit. Runners should stick to the pedestrian side of the path and be courteous of slower walkers. Running is a great way to see a lot of the park in a less time than walking it. My husband ran the loop a few times on a Saturday morning and loved it. You could also do some hill work on the walking trails.
- Rollerblades: This is a popular option among locals, but it’s not ideal for tourists who can’t fit rollerblades in their carry-on.
- Car: Vehicle traffic is allowed in Stanley Park on a limited set of roads. There’s a pretty large highway that cuts through the center and leads to the beautiful Lions Gate Bridge. Smaller roads roughly follow the perimeter of the park, with metered parking at many of the park’s main attractions. This is a good option for visitors with mobility issues, but I otherwise wouldn’t recommend driving.
- Guided Tour: There are several ways to see Stanley Park on a guided tour. There are tour options by coach bus, bike and even horse-drawn carriage. These are good options if you want to learn more about the park, its history and the specific sites.
- Bike: And finally, you can bike through Stanley Park. This is a great way to see a lot of the park in a more reasonable amount of time. You can bike along the Seawall or on some of the hiking trails. Didn’t travel with a bike? No problem. You can easily rent one right by the park! If you’re able, biking is the best way to see Stanley Park.
Biking Around Stanley Park
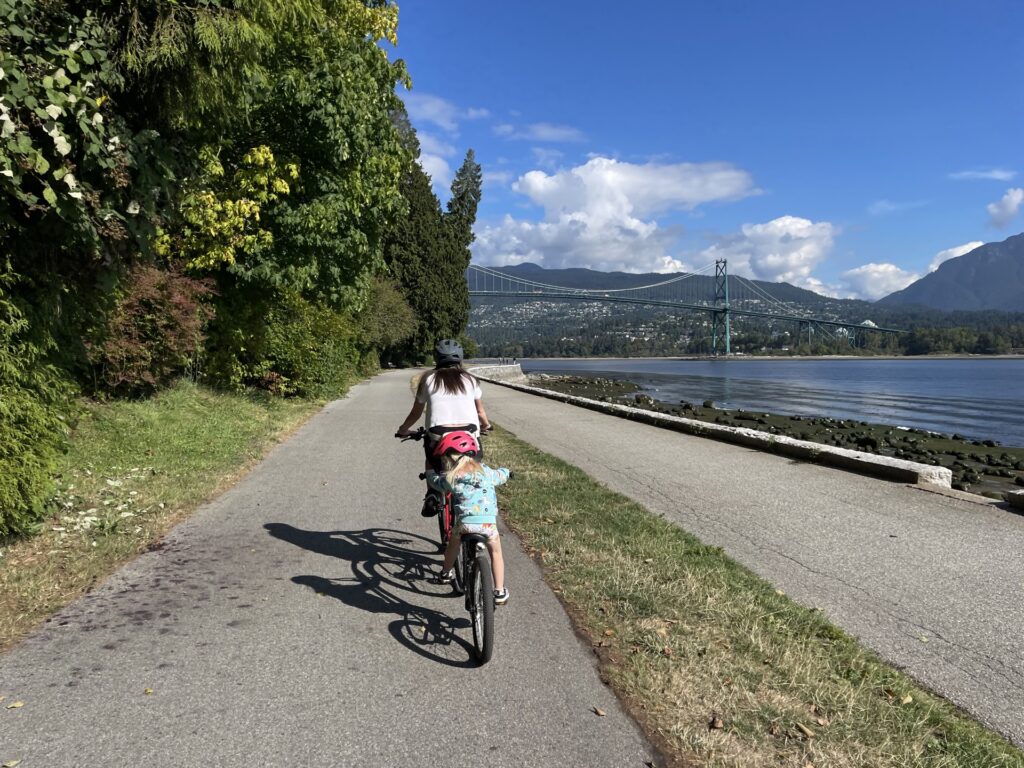
There are plenty of great ways to explore Stanley Park, but biking is my favorite. Riding bikes around the Seawall was beautiful and allowed us to see a lot more of the park than we would have had time for on foot.
If you’re hesitant about biking, I hear you. I generally dislike biking quite strongly. (I was involved in a bike accident while triathlon training, and the bike culture in on my old hometown of Chicago was very intense.) I’ve never rented a bike in other biking cities like Amsterdam or Copenhagen, so I didn’t think I’d end up doing it in Vancouver either.
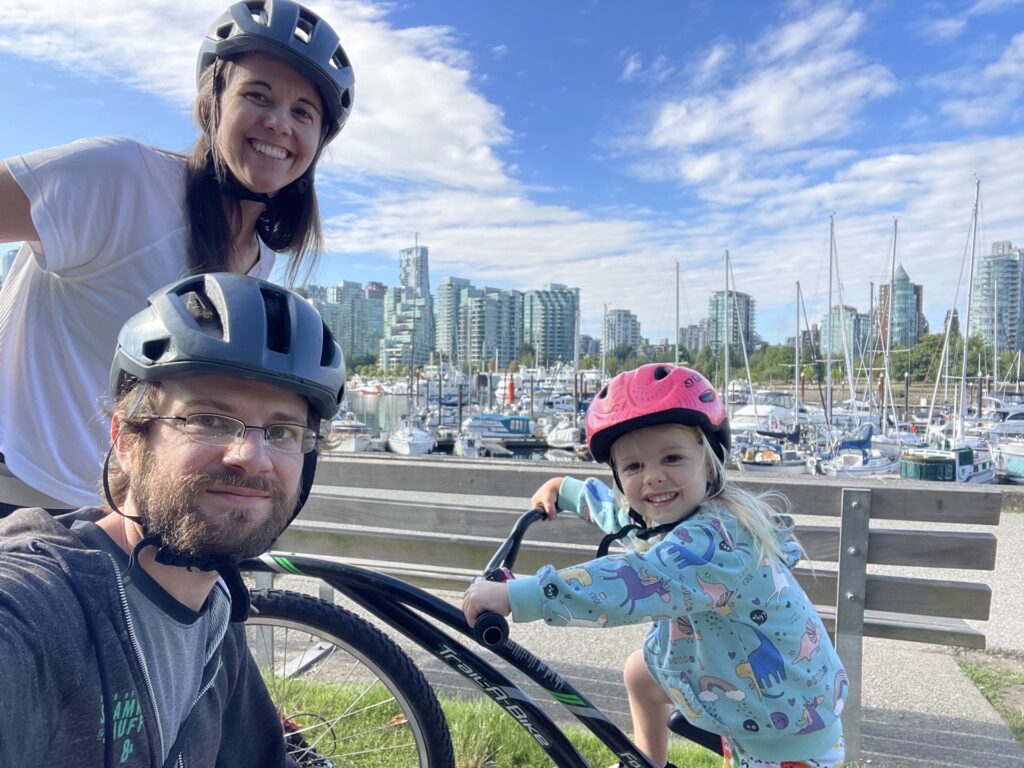
I decided to go for it at the last minute because I really wanted to see more of the park for the sake of this post. I also thought there was a good chance my kid would love the tail-a-bike — and they did! Our entire family had the best time. The path is well marked, well-paved and mostly flat. The views were beautiful and we stopped several times to soak it all in.
If you’re physically able and remotely interested, I’d highly recommend biking around Stanley Park. In these next sections, we’ll walk you through the rental process and share some tips for biking in the park.
If you’re definitely not interested in biking, you can skip to the next section about the best things to do in Stanley Park.
How to Rent a Bike in Stanley Park
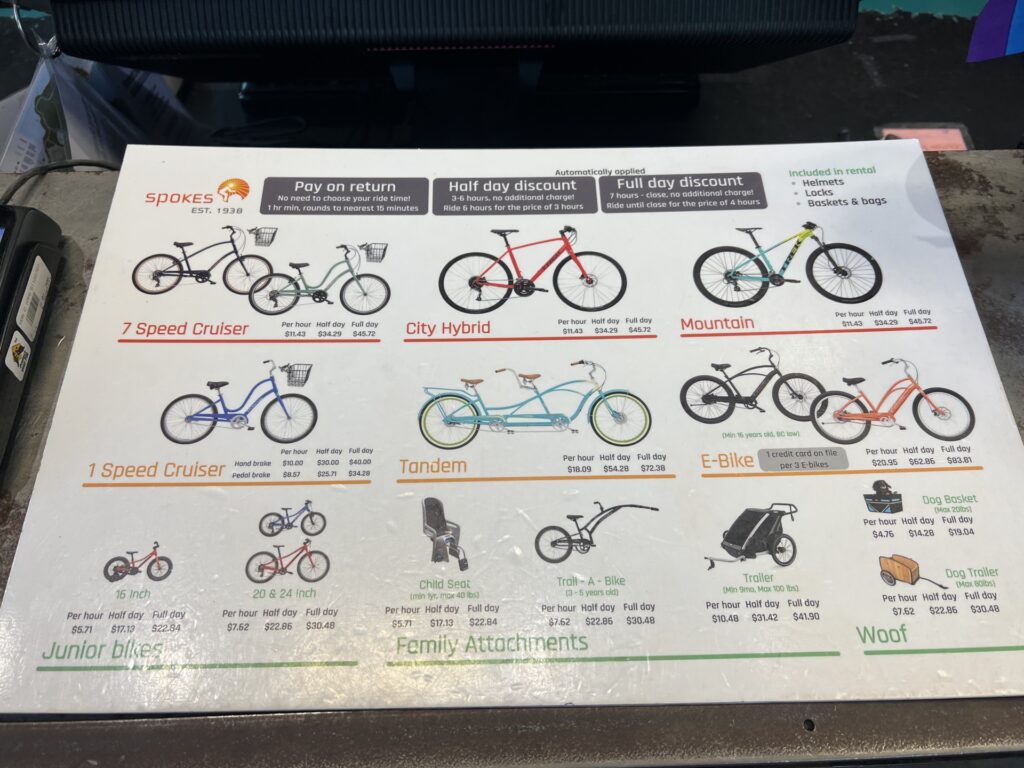
There are several bike rental options near Stanley Park, but in this post were going to focus on Spokes. They have a location right across the street from the Seawall, a huge inventory of bikes, and they’re very highly rated across many platforms. Plus, they’re the company we rented through, so we can personally vouch for the experience. (This post is not sponsored. I just had a really great experience.)
Renting a bike from Spokes is easy. Here’s what you can expect from the experience.
- Set up your profile. When you enter Spokes, there are tablet devices along the wall. Enter some basic information to create your profile. You can also do this online in advance.
- Select your bike. Walk up to the counter and tell them what kind of bike(s) you want. They have a few different styles to choose from, including adult bikes, children’s bikes, tandem bikes, plus attachments for dogs and kids. You can also rent bike helmets. They will take your credit card information now, but you won’t be charged until you return the bike.
- Collect your bike. They’ll give you a receipt with your bike info and send you outside to a different employee. Show them you’re receipt and they’ll bring you your requested bike(s). If you have an attachment, they’ll set it up for you. Be sure to keep your receipt somewhere safe to make the return process easier.
- Bike Stanley Park. As soon as you have your bike, you’re free to go! Cross Georgia Street and ride (or walk your bike) one block east toward the water. This bike path leads straight to the start of the Seawall. You can start the full Seawall loop (counter-clockwise only) or venture off onto one of the other paths that cut through the middle of the park.
- Return your bike and pay. When you’re done riding, return to Spoke. There will be employees outside who will take your bike. Then take your receipt inside to pay for your rental. Rates are hourly, but there’s a discount for half and full day rentals (6 hours for the price of 3, or 7+ hours for the price of 4). They will charge the card on file or you can give them a different one.

Tips for Biking in Stanley Park
- Go early. This will help you beat the crowds at the bike rental facility and on the Seawall, which makes the entire experience more relaxing. Plus, you’ll have more time to spend in Stanley Park!
- Rent a helmet. Even if you don’t plan to go fast. Even if you’re an experienced biker. Rent the helmet. You probably won’t need it but maybe it’ll save your life. (I was a safe biker, but someone else wasn’t paying attention and rode right in front of me. I hit him dead on and went flying off the front of my bike and landed on my head. My helmet was dented flat but my skull wasn’t. Please wear a helmet! This wasn’t at Stanley Park, but it could happen anywhere.)
- Ride the Seawall counter clockwise. Bike traffic on the Seawall is one way only. The path is narrow at times with blind turns, so this is important for everyone’s safety. The bike paths are all labeled with directional signs, so be sure to follow them.
- Obey posted signs. Throughout all of Stanley Park, there are posted signs for when bikers need to dismount or for when passing is prohibited. Again, in the spirit of safety, it’s important to follow these rules.
- Stay in the bike lane. The Seawall is divided for bikers and pedestrians. If you’re biking, be sure you stay on the bike line.
- Be careful passing and being passed. Even at its widest point, the bike path is still narrow and there are many turns. Only pass on the left when there is room for two bikes across. If you need to pass, say “On your left” or ring your bell to alert the other biker. When your not passing, always stay to the right and listen for other bikers.
- Check the map. The Seawall circles the entire park. Once you start, there aren’t many options to cut the path short. If you don’t think you can make the full 10k, be sure you know what alternative path you’re going to take. Also note that the paths through the park are much hillier than the Seawall, so even if its shorter it might still be harder. The map will also indicate which paths allow bikes and which ones don’t. Paper maps are available at Spokes or you can download one online.
- Make frequent stops. There are so many great views in and around Stanley Park! We found ourselves stopping every kilometer or so to take pictures, see totem poles, or walk along a beach. If you rented a bike though, just be sure to lock it or keep it in eyesight.
- Fast bikers can use the roads. Bike traffic on the Seawall is slow. That makes it very comfortable for novice bikers, but difficult for advanced riders. If you’re a fast biker and are just looking to get in a long ride at a high speed, avoid the Seawall. We noticed most of the serious bikers were riding along the road at faster speeds.
- Avoid bike-free trails. Many of the trails around Stanley Park are open to bikers, but not all of them. Be sure to review the map and keep an eye out for any posted signs.
What to Do in Stanley Park
There is so much to see and do in Stanley Park. I was initially really overwhelmed and had a hard time prioritizing it all. After experiencing the park, I have a better sense of this and wanted to share what I discovered.
The biggest thing is deciding whether you’re going to stay on the Seawall or if you want to venture onto the walking trails. For that reason, I broke this section up into those two scenarios, plus a third for attractions that take more time.
What to See Along the Stanley Park Seawall
If you’re riding or walking the Seawall, here are the best places to stop, in order. You can find the exact locations for all of these spots in Google Maps. I’ve also indicated rough distances based on a start near Devonian Harbour Park.
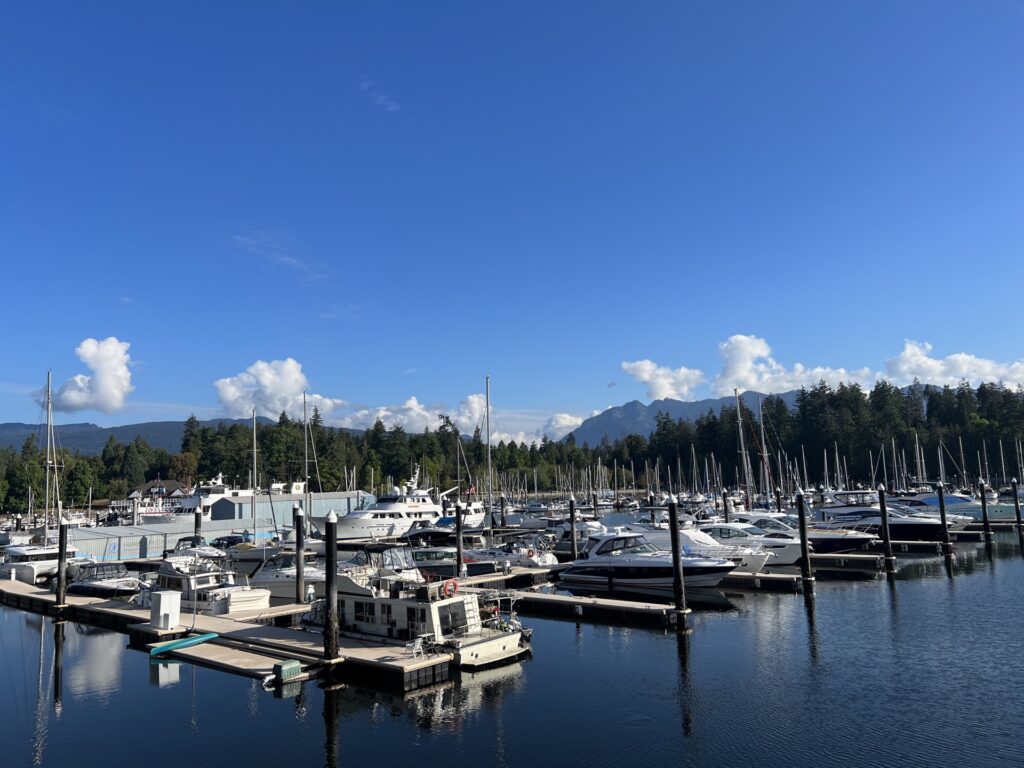
- Devonian Harbour Park (0k). The route starts by this small park on the harbor. Be sure to stop at some point around here for great views of the marina against the trees and mountains.
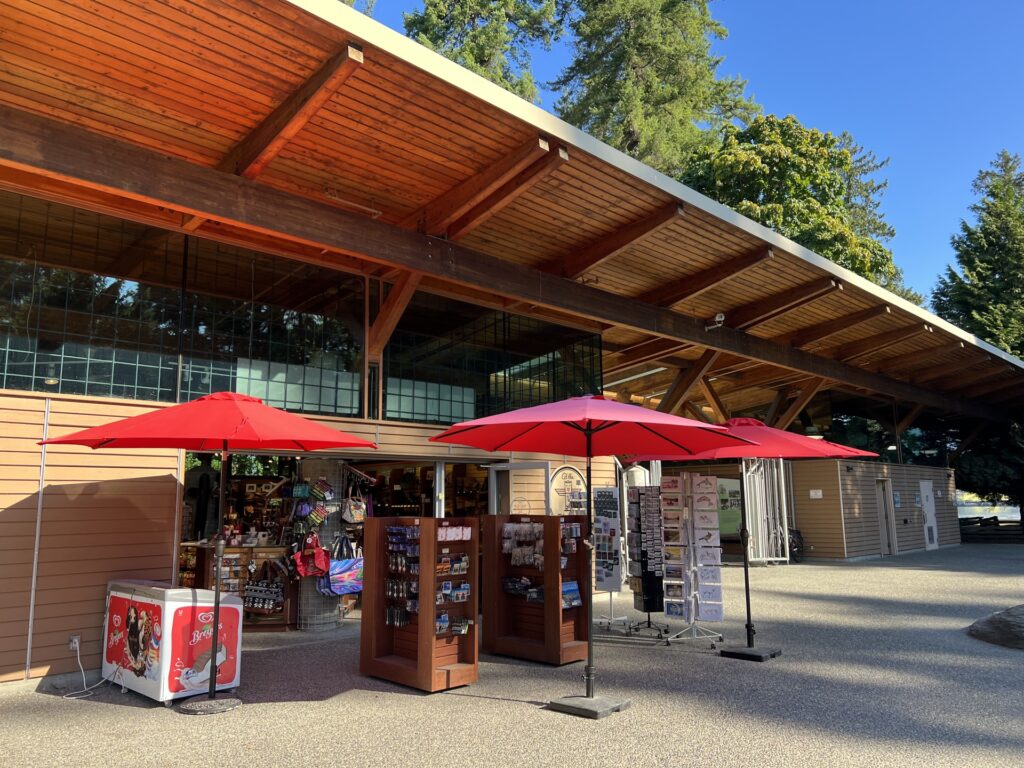
- Totem Poles (1.5k). Just after Deadman’s Island you’ll see an exit path for the totem poles. There are a handful of totems and a sign with a bit of information. There’s also bathrooms, a gift shop and a small cafe here.
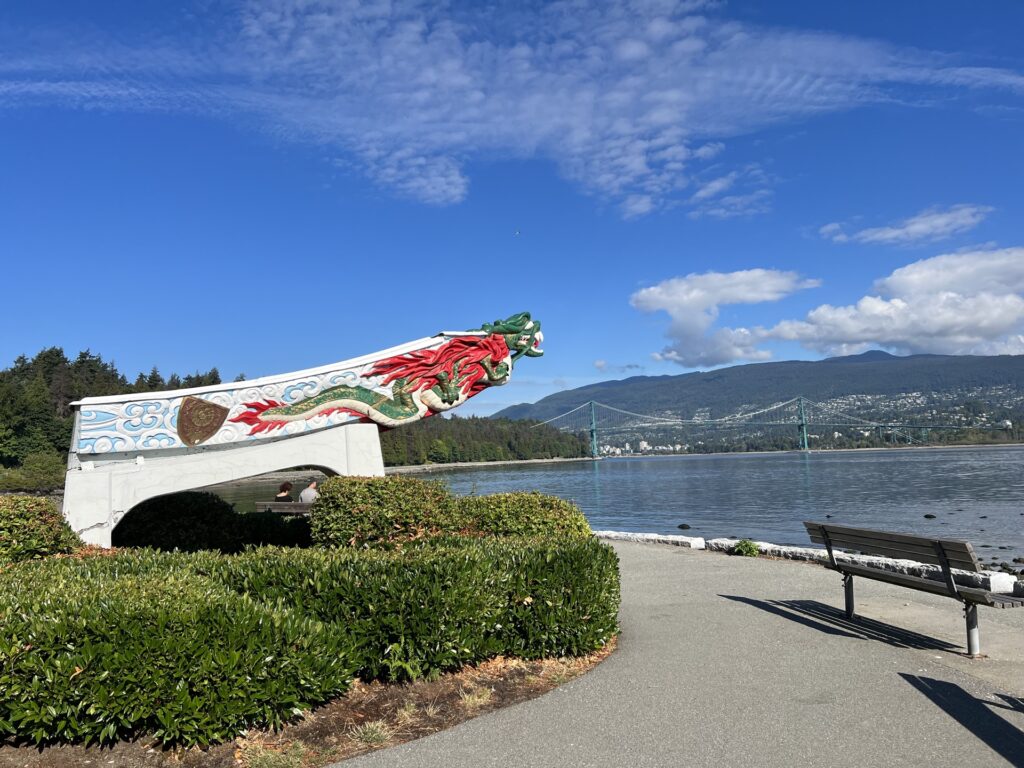
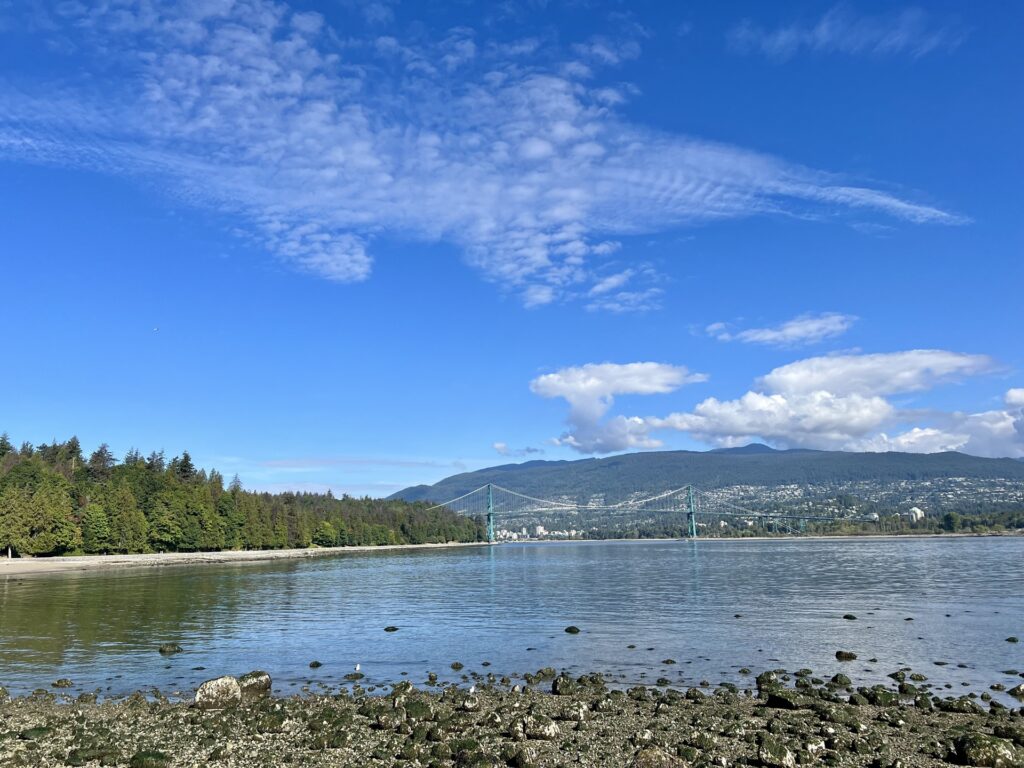
- Girl in a Wetsuit Statue (3k). This entire area is lovely. There is the statue of course, but also a replica of a Japanese ship figurehead, lighthouse and a great view of Lions Gate Bridge. There are benches to sit and rest at this stop.
- Lumberman’s Arch Splash Pad (3k). Just past the previous stop is a large splash pad area. This is a good stop for kids on hot days. If you turn left here, there’s also a playground not too far away.
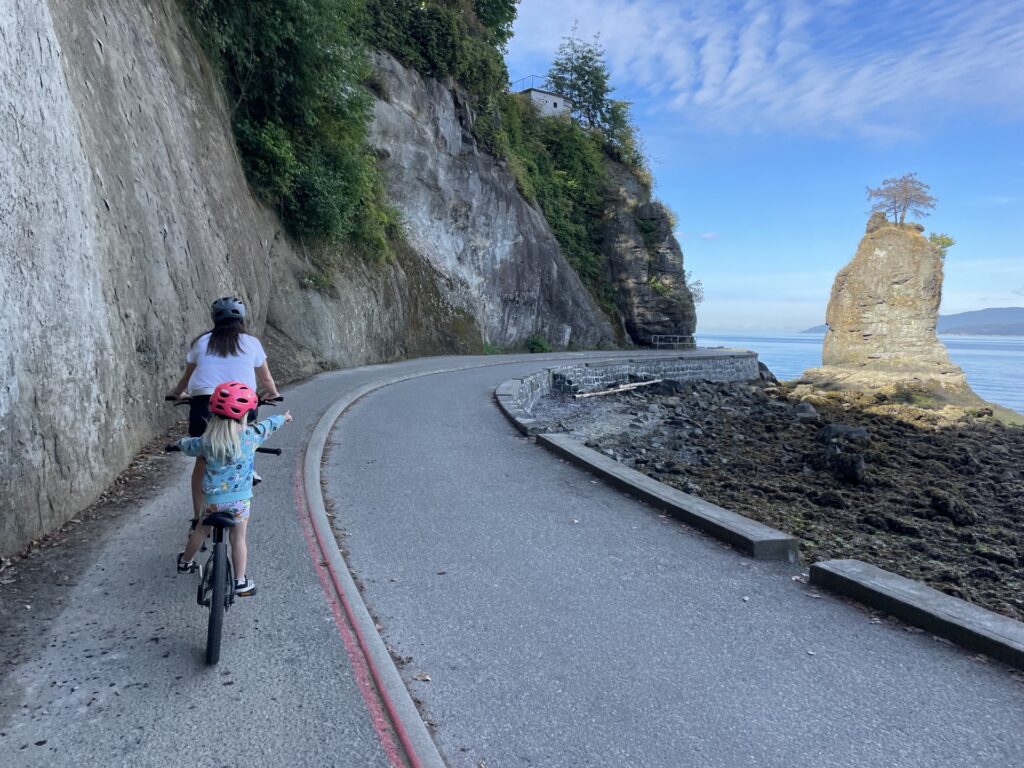
- Siwash Rock (6k). The Seawall between Prospect Point and Siwash Rock was the most stressful for me. It was narrow and had lots of turns. Siwash Rock is a cool rock that marks the end of that section. There’s no good place to pull off and see the rock, but it’s cool to see when you ride by and you can stop shortly after it.
- Third Beach (6.5k). This beach starts rocky but gives way to a sandy section. You can swim here, but it was mostly filled with sunbathers and people looking for crabs among the rocks. There’s a restaurant nearby and it’s overall a good resting point.
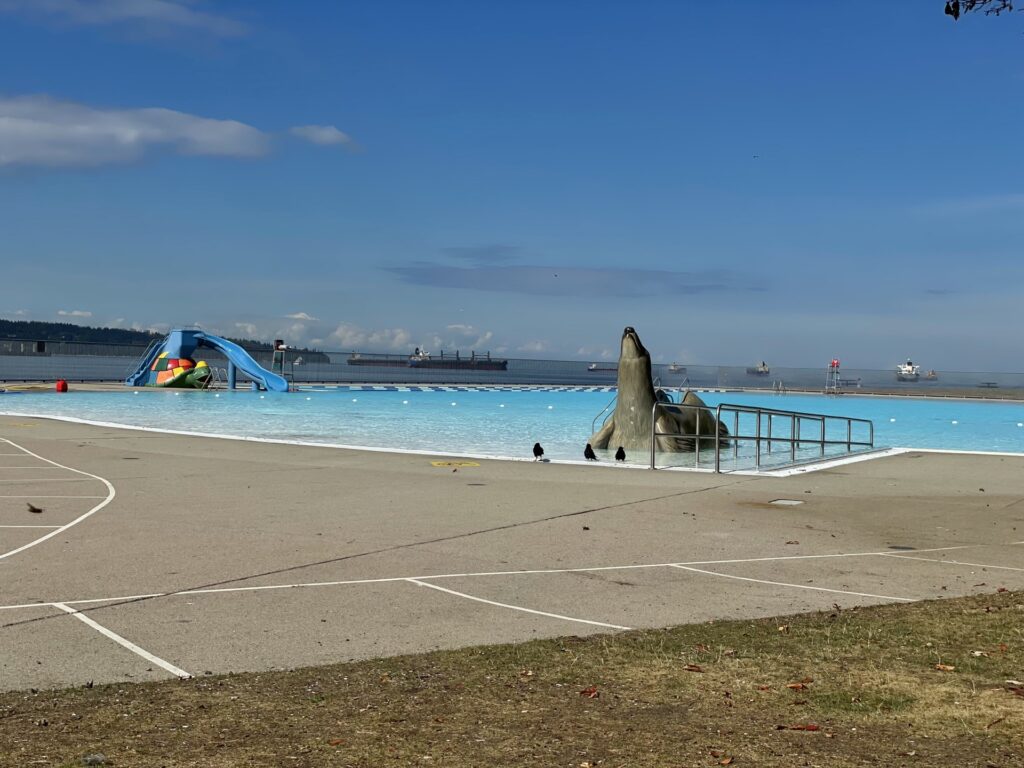
- Second Beach (8k). This beach is fine, but mostly just for collecting shells and exploring the tide pools. The main reason to stop here is everything else nearby. There’s a large public pool, two different playgrounds, bathrooms, a snack bar, and lots of picnic and play space.
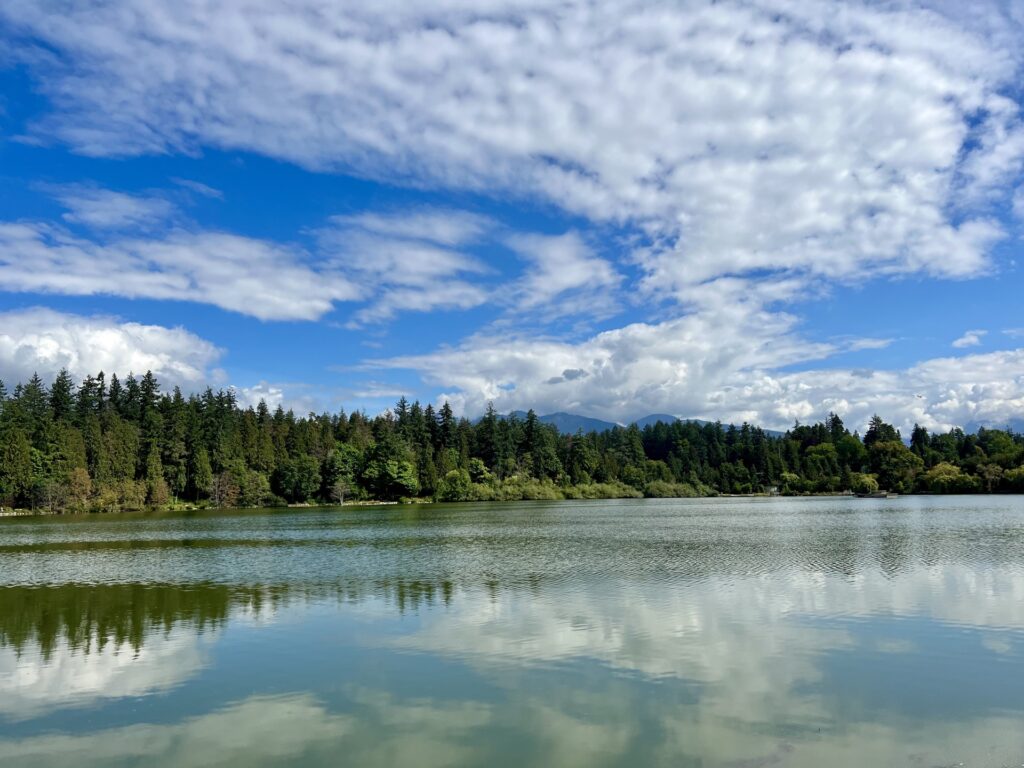
- Lost Lagoon (9k). This was one of the most beautiful spots on the trail. If I came back again, I’d try to take a full walk around the lagoon. But if you don’t have time for that, passing by the south side is lovely.


Things to See Along the Stanley Park Walking Trails
These locations all require getting off the Seawall and following some of the walking trails that cut through the center of the park. It takes a bit more effort and time, but provides a different experience than the standard Seawall. We personally didn’t venture off the Seawall to see these attractions.
- Prospect Point Lookout: This lookout is located directly above the Prospect Point turn on the Seawall. Most people agree that this area has the best views in Stanley Park. To get there, you’ll have to exit the Seawall before the bridge around the 4.5k mark. There are signs that indicate the turnoff. It’s then about a half mile up to the lookout point.
- Hollow Tree: This massive red cedar tree grew in Stanley Park for 700-800 years before it was damaged in a severe windstorm in 2006. Today you can see the hollowed trunk that remains by following the hiking trails near Siwash Rock.
- Monument Trees: Most of the oldest trees in the park were cut down during a brief period of logging in the 1800s before the land was designated a park. A few trees survived and are now called monument trees. You can find these trees along the hiking trails including Third Beach Trail, Siwash Rock Trail and north of Beaver Creek.
- Rose Garden: The Rose Garden is a beautifully manicured section of the park. The roses reach their peak bloom between June and September, but there are other plants and flowers that make the garden popular all year. There’s a playground, rock garden, restaurant and bathrooms nearby. This area is located just off the Seawall in the south center of the park.
- Beaver Lake: Unlike Lost Lagoon which is along the main bike path and roads, Beaver Lake is only accessible via walking trails. This is a great way to experience the park in its most natural form. To get here, exit the Seawall just before the 4k mark. There are signs posted.
More Activities in Stanley Park
There are a few more things to do in Stanley Park if you have a bit more time. These activities can stand on their own and don’t need to be done at the same time that you explore the park and Seawall. They’re mostly located on the southern portion of the park, so they’re easier to get to from downtown.
- Second Beach Swimming Pool: This public pool is a popular destination for families in the summer. The pool is open from late May to early September, with several 2.5 hour open swim sessions daily. Reservations are recommended and can be booked online 3 days in advance.
- Vancouver Aquarium: Located in the heart of Stanley Park, this aquarium is also popular with kids. Reviews suggest that it is a bit small relative to the ticket price, but most think it’s decent quality.
- Malkin Bowl: If your visiting in the Spring or Fall, it’s worth taking a look at the upcoming shows at this outdoor amphitheater. They host popular bands and smaller acts, and it makes for a lovely evening outside.
- Stanley Park Railway: I was so excited to check this out, but unfortunately it was closed for renovations during our visit. When it’s operating, you can ride the the small train (with cars that more resemble a tram) on a 15-minute loop through a scenic portion of the park. If you turn off the Seawall at the splash pad, it’s about a 10 minute walk to the train.
Services and Amenities at Stanley Park
Stanley Park is a natural park, but it still has the essential amenities. You can find things like food and bathrooms scattered around the park. Check out this Stanley Park map for exact locations of most of these services. Here’s what you can expect to find in the park.
- Bathrooms: There are several bathrooms around the park, primarily along the Seawall and by picnic areas and major attractions. You can find exact locations on the above linked map and in Google Maps.
- Food & Restaurants: There are a handful of restaurants and cafes around the park, but food is mostly sparse along the Seawall. The main restaurants are Stanley’s Bar & Grill (between the Rose Garden & Aquarium), Teahouse in Stanley Park (near the south end of Third Beach) and Stanley Park Brewing (south of Lost Lagoon). A few other snack bars are also available with limited options.
- Coffee: For a caffeine boost in the park, there is a small coffee shop inside the gift shop near the Totem Poles or they sell coffee at the snack bar near Second Beach Swimming Pool. Do note that neither of these locations are open very early (usually they open around 9 or 10 AM).
- Water: There are drinking fountains around the park (map here) and water and other beverages are sold at all restaurants and cafes.
- Wifi: There is free wifi available in select areas around the park. These locations are: Stanley Park Information Booth, Totem Poles, Prospect Point Lookout, Ferguson Point and Second Beach.
- First Aid: Limited medical support is available at lifeguard stations near beaches and pools during operating hours. For emergencies, dial 9-1-1.
- Parking: If you’re driving, there are several paid parking locations around the park. All of these locations are on this map here.
How Much Time Do You need at Stanley Park
Stanley park has a lot to offer and you can do it a lot of different ways. Here’s a sample look at what you can do in Stanley Park with a variety of timeframes.
- 1 Hour: Bike the Seawall making limited stops or just walk the southern portion of the park between Devonian Harbour Park and Lost Lagoon.
- 2 Hours: Bike the Seawall at a leisurely pace or walk a smaller portion of the Seawall, probably cutting over at Beaver Lake and then walking back on South Creek Trail.
- 3 Hours: Walk the Seawall at a comfortable pace with a few leisurely stops.
- 4 Hours: Bike or walk the Seawall, adding in significant stops at beaches, playgrounds and lookouts.
- 5-6 Hours: Bike or walk the Seawall, taking multiple detours on the walking trails to explore the center of the park.
- 6-8 Hours: All of the above with extra time to eat at a restaurant, visit the Aquarium, and/or swim at the pool or beach.
Generally, I’d suggest setting aside 4 hours for Stanley Park. That gives you ample time to walk or bike the Seawall, with plenty of time to take breaks as needed. Personally, we spent 3 hours on our first day, but then came back for another 3 hours a few days later.
Sample Stanley Park Itinerary
Now that we’ve covered everything you need to know about Stanley Park (hopefully!), it’s time to put it all together into one complete itinerary. Here’s how we’d recommend spending a day at Stanley Park. This itinerary should take around 3-4 hours.
- Coffee & Breakfast: Grab a coffee and eat a solid breakfast to power you through the day. There are a few options near Stanley Park, but you might be better off getting something near your hotel before you head out.
- Rent Bikes at Spokes: Head to Spokes (1798 W Georgia Street) to rent a bike. Try to get there around the time they open (9 AM) to avoid any lines or crowds on the Seawall.
- Devonian Harbour Park: Walk one block east to the waterfront. Be sure to snap some “before” photos with your bike here with the marina and mountains in the background.
- Rose Garden: If you’re visiting in the summer, head north to the Rose Garden for a quick visit before you get going on the Seawall.
- Totem Poles: Shortly into your ride on the Seawall, you’ll see signs for Totem Poles. This is a really cool area with several interesting totems. When you’re done, take a quick bathroom break and maybe grab a snack for the road at the cafe.
- Girl in a Wetsuit Statue: Continue on and you’ll see a large lighthouse and the statue in the water. Pull off here and grab a seat on one of the benches to take in the beautiful views.
- Splash pad: Just a bit past the statue is a large splash pad. If you have little ones and/or if it’s a hot day, it’s a good stop. There’s also a playground just off the Seawall from there.
- Beaver Lake: About a half kilometer later you’ll see a small set of stairs that leads to a walking path toward Beaver Lake. Bikes are not allowed on this stretch (though some maps disagree). To be safe, you can lock your bike at a nearby bench while you take this short excursion.
- Prospect Point Turn Off: Head back to the Seawall and continue on. Shortly before the bridge, you’ll see an exit for Prospect Point. If you want to go to the lookout, exit here. It’s a hilly ride! If you’re not heading up, you might want to take a short break here anyway. The next section is a bit stressful.
- Third Beach and Siwash Rock: The next bit is quite narrow and windy, so focus on biking safely. When you see the giant rock in the water, you’ll know you’ve almost made it to the end of this section. After the rock, the path will open. First you’ll see a rock beach followed by the sandier Third Beach. Take a break at any point along here.
- Second Beach: The stretch between Third Beach and Second Beach is the last of the main Seawall path, so enjoy it. Second Beach is a good spot for a longer break. You can walk out on the beach toward the water or relax at one of the many picnic tables and benches. There are two playgrounds nearby and lots of grass space to run around.
- Lunch at Stanley Park Brewing: Walk a bit south to Stanley Park Brewing for lunch and a well-earned beer. You can make reservations online, but you can usually just walk in.
- Lost Lagoon: Make your way back to the path and cut east toward Lost Lagoon. You’ll probably want to just focus on the south side of the lagoon, but if you have more time you can make the full loop around it.
- Return your bike to Spokes: The path leads right back to Devonian Harbour Park where you started. From here, it’s a one block walk back to Spokes to return your bike rental.
- Bonus! Walk down Robson Street: If you are heading back downtown, I’d suggest walking down Robson Street. This street has a great vibe in the afternoon with tons of shops and restaurants. We picked up some macarons from Ladurée which were a perfect treat after a long day at Stanley Park.
And that’s how we’d spend a day in Stanley Park! What about you? Let me know in the comments your favorite place in the park!
Looking for more things to do? Check our our list of 10 Things To Do In Vancouver On Your First Visit.
More from This Trip
- American Airlines Main Cabin Extra Review
- 10 Best Things to do in Toronto | City Guide + Sample Itinerary
- Perfect Niagara Falls Day Trip From Toronto
- 10 Things To Do In Vancouver On Your First Visit
- Stanley Park Itinerary – How to Spend 1 Day in Vancouver’s Largest Park
- Air Canada Business Class Review – A321 from YVR to YYZ
- Air Canada Business Class Review – Toronto to Chicago
If you’re planning a visit to Canada, you might also be interested in our Flight Review of Business Class on Air Canada 787.
